DDOS attacks are not always from an army of malicious network of zombie PC’s accross the world. Sometimes, legitimate services such as search engine bots, or other bots such as Semrush or DataForSeo consume too much resources on your hosting server and use > 100% of your CPUs. All the sites and services on your server get slow, and you get spammed by tons of alerts on your email and mobile.
This post was writting with Plesk 18 (Obsidian) and Debian 9 in mind.
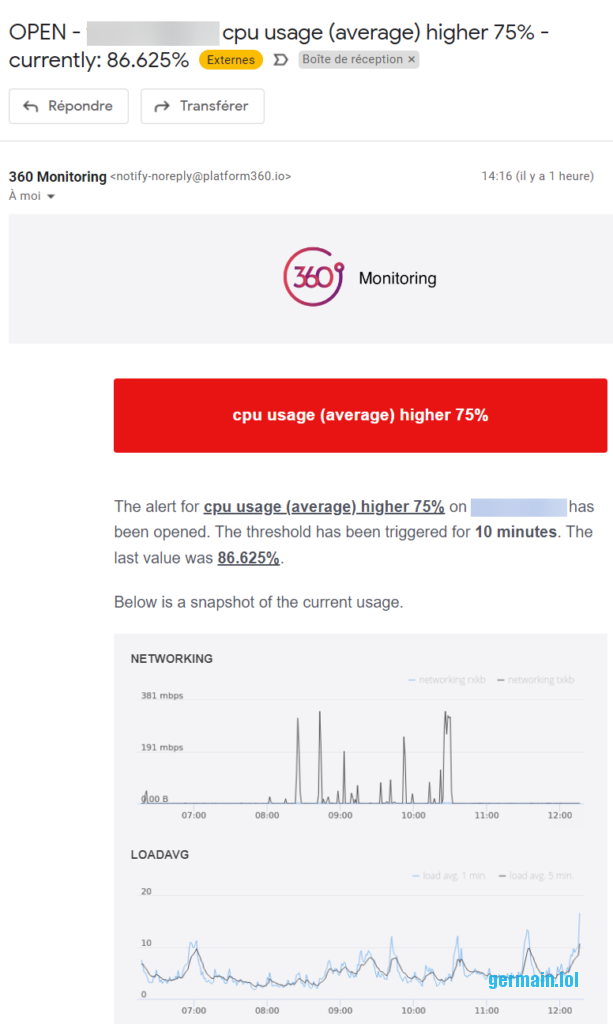
Detecting attacks from Plesk’s 360° Monitoring
You can get 1 free server monitor at Plesk 360, if it sends you the kind of alerts shown below then you are probably under attack because something is consuming too many resources on your box.
Inspect the server activity
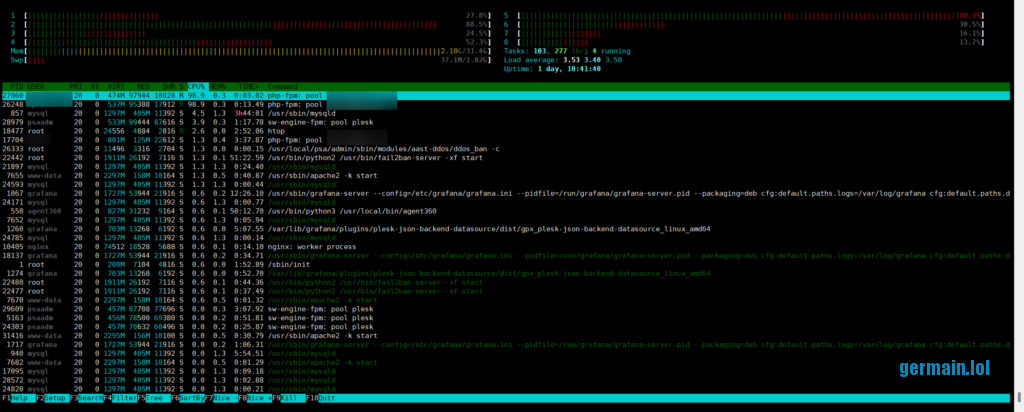
SSH into the machine and launch the htop command.
The example below is pretty cool but if everything is red and your load average is > to your number of CPUs or VPCUs, you have to mitigate the situation.
Sort the processes by CPU% (press F6, then arrow-down key navigate to PERCENT_CPU and press Enter).
If the top process is Apache / Nginx / PHP and belongs to a user who owns a website that you are hosting, note it down and let’s inspect this!
Acknowledge suspicious activity
If the user owns multiple websites in your Plesk installation, you can use some advice at Plesk KB: How to diagnose a DoS/DDoS attack and find websites under attack on a Plesk server, in particular the second section that describes the counting of the requests per website by parsing the logs for a string that matches a date or hour:
Replace ’02/Oct/2022′ by a relevant string
root@***:/var/www/vhosts/*****/logs# cd /var/www/vhosts/system
root@***:/var/www/vhosts/system# for i in *;do echo -n "$i "; grep '02/Oct/2022' $i/logs/access_ssl_log | awk '{print $1}' | wc -l;done > ~/requests
root@***:/var/www/vhosts/system# cat ~/requests
site1****** 0
site2****** 6
site3****** 21
site4****** 9858
site5****** 52
site6****** 512
site7****** 109
site8****** 4521
site9****** 3449
site10***** 5
site11***** 571
site12***** 309
site13***** 16
germain.lol 1254
Here we can see that site4 is consuming ~half of the server resources.
Take a look at the access logs directory of the website that belongs to the user whose processes are killing your CPU. The logs are located in /var/www/vhosts/domain-name/logs, use the ls -lah command to find large log files. In the example below, 3.7 GB of logs since 6:38 this morning is horrifyingly huge!
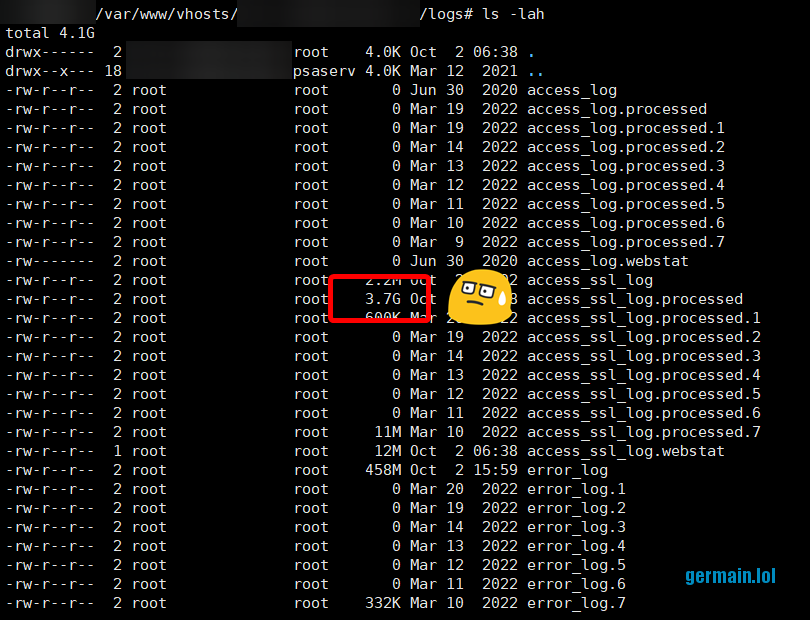
Use the tail -f access_ssl_log command to get an idea of what is filling this log so fast:
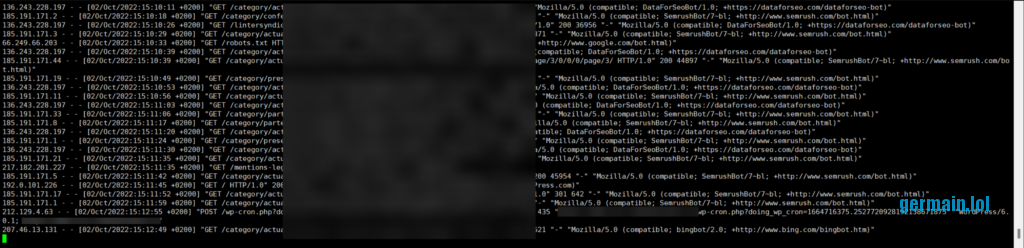
We can see that Semrush bot and DataForSeo bots are sending many queries.
Bulk blocking
There are many was to block requests, especially when it comes to bots, for example:
- Custom rules in your .htaccess (or Nginx rules)
- Custom rules in your robots.txt file
- Relying on the plesk-apache-badbot fail2ban built-in rules
- Using an extension such as (D)DoS Deflate Interface
Custom rules imply changing your customer’s website, which you certainly don’t want to do.
The last two ideas didn’t auto-mitigate the attack.
Therefore we have to handle the situation manually.
Single-IP blocking
If all the requests come from the same IP, simply create a basic firewall rule from Plesk admin:
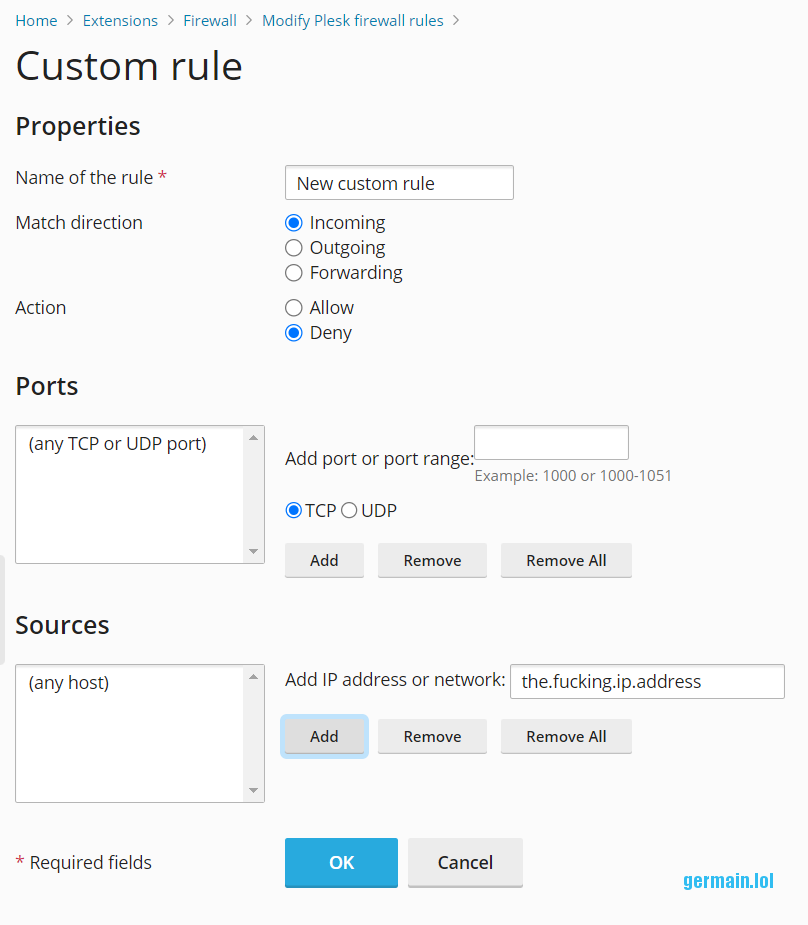
Don’t forget to click « Apply » at the second step after clicking « OK »!
Blocking a company or ISP, aka range-blocking
It may not be a wise idea to block a whole company or ISP, but we’re trying to mitigate an attack here! Of course you don’t want to block all users from all your country’s ISPs at once, but there’s a good chance that you can block large company networks (including web and cloud hosters) without compromising end-users access to the websites you host.
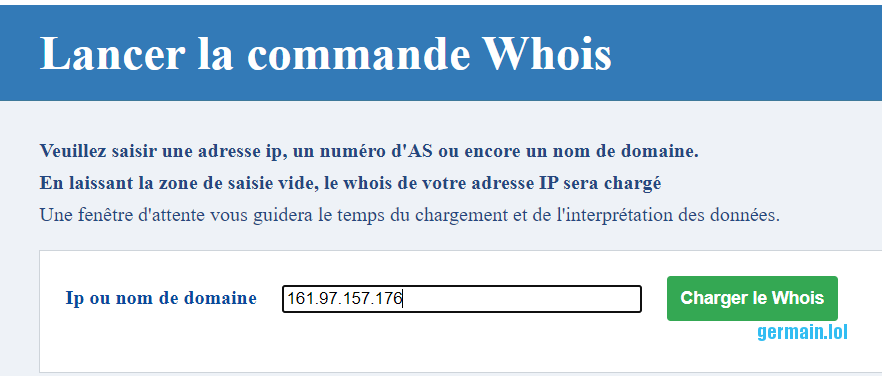
From the logs below, let’s have a look at this DataForSEO’s IP: 161.97.157.176
Find whose IP it is
I like to use crawl-tools.com for this because they gather the data from all RIRs at once (RIPE for Europe, ARIN for USA, etc), it’s more convenient.
From the results we can tell that the said IP belogs to Contabo:
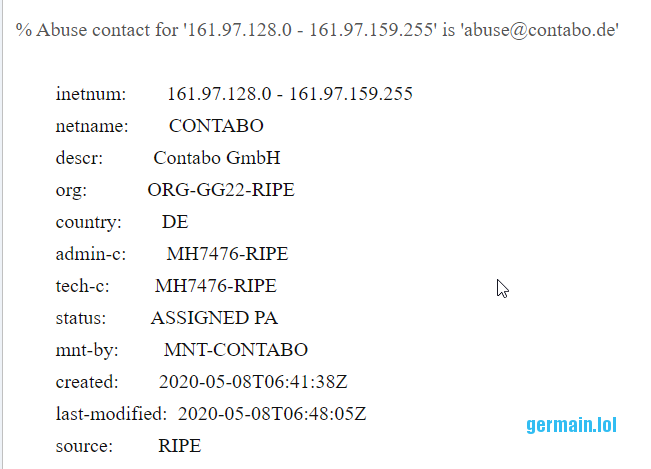
It is an hosting provider, the one used by DataForSEO’s bot.

Is it safe to block all traffic to a hosting provider?
Heck yes!
We want to preserve resources for real human users, not bots.
Beware: by doing so, you’ll be blocking Contabo and all their users, including legitimate users who have setup a VPN and access to your website behind it.
Find all the IPs that this company owns
As you know, a hosting company has many IPs, so we want to find them all – not only the one used by the bots. By definition, bots are deployed under multiple instances, which all have different and changing IPs.
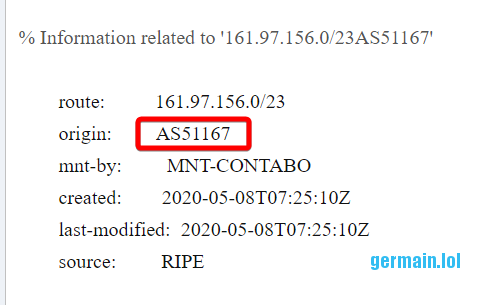
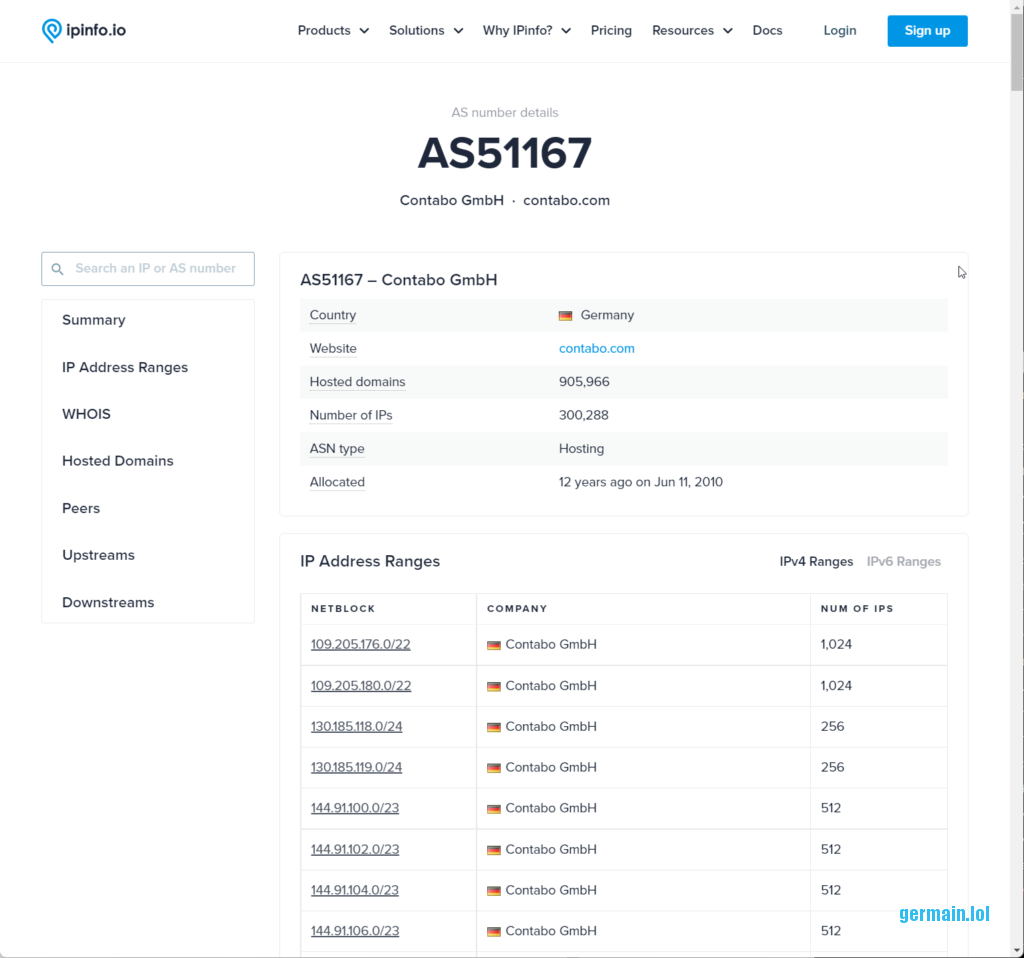
What we are looking for is the « Autonomous System Number » (ASN), in this case: AS51167
Here we can see that the source is RIPE, which is the european RIR.
The easiest way to find all the IPs that belong to an ASN is by using https://ipinfo.io/. Just type in the ASN and all its IP ranges will pop:
Bulk-block IPs in IPtables through Plesk
It would be cumbersome to copy/paste all IPs one by one in the firewall Custom Rule Plesk form.
Here’s my solution to do it en masse.
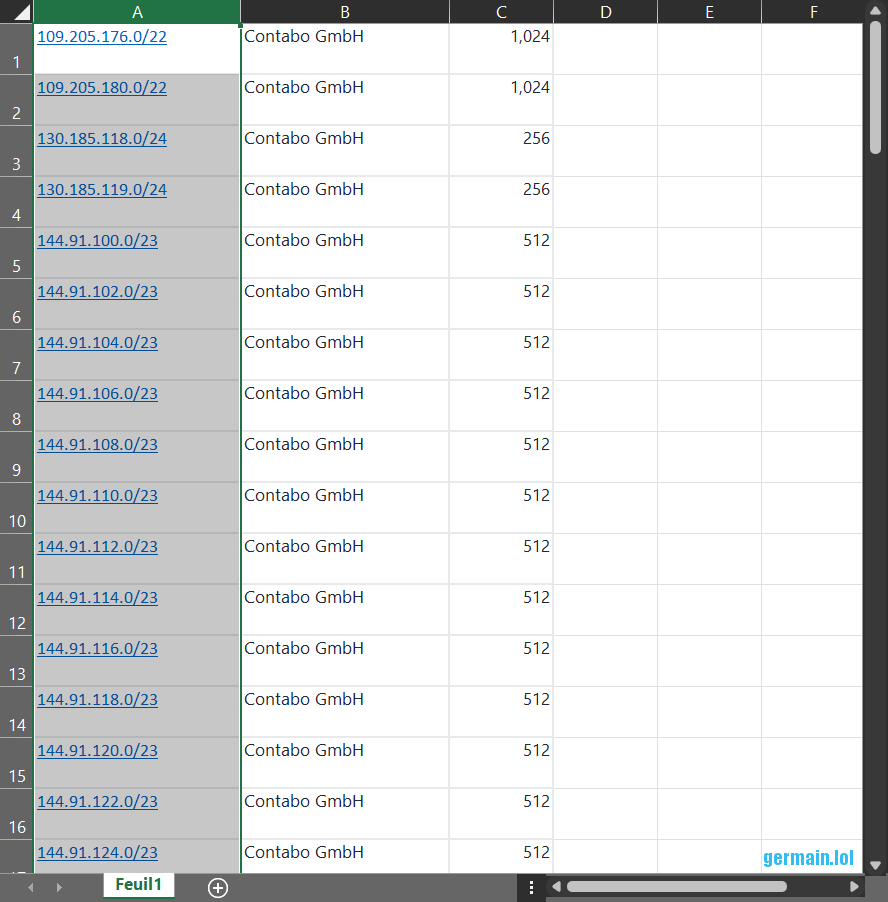
First, copy-paste all the IP ranges inside a blank Excel spreadsheet:
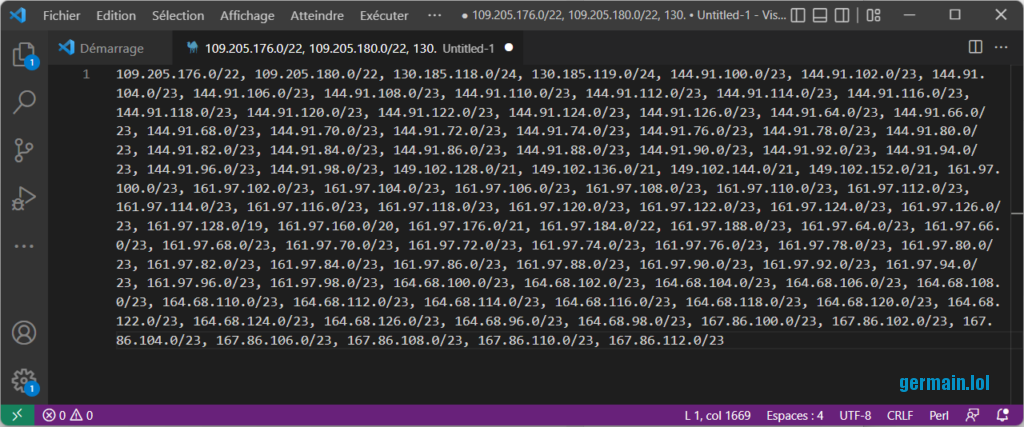
Then, paste the column A contents into Visual Studio Code to edit multiple lines at once.
It also works with SublimText (shortcuts may vary).

Type ctrl + a to select all,
Type ctrl + shift + i to enter multi-line edit mode,
Type 🡼 to go to the begining of each line and remove extra whitespaces,
Type End to go to the end of each line and add a coma,
Type Del to remove all linebreaks and concatenate all lines into a single one,
Type spacebar to add an extra spacer,
Type End to go to the end of the single line,
Type backspace twice to remove the last space and coma,
You should end up with this:
Now that you have a single-line, coma-separated list of IP ranges, you need to insert it into to IPtables.
However the Plesk firewall Custom Rules form doesn’t accept this syntax:
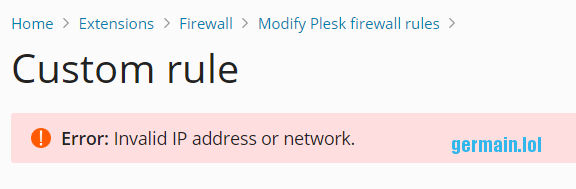
So you have to SSH into your server again and do it with these commands (obviously you must replace my Contebo’s list with yours):
root@***:~# /usr/local/psa/bin/modules/firewall/settings -s -name 'ddos-contabo' -direction input -action deny -ports '' -remote-addresses "109.205.176.0/22, 109.205.180.0/22, 130.185.118.0/24, 130.185.119.0/24, 144.91.100.0/23, 144.91.102.0/23, 144.91.104.0/23, 144.91.106.0/23, 144.91.108.0/23, 144.91.110.0/23, 144.91.112.0/23, 144.91.114.0/23, 144.91.116.0/23, 144.91.118.0/23, 144.91.120.0/23, 144.91.122.0/23, 144.91.124.0/23, 144.91.126.0/23, 144.91.64.0/23, 144.91.66.0/23, 144.91.68.0/23, 144.91.70.0/23, 144.91.72.0/23, 144.91.74.0/23, 144.91.76.0/23, 144.91.78.0/23, 144.91.80.0/23, 144.91.82.0/23, 144.91.84.0/23, 144.91.86.0/23, 144.91.88.0/23, 144.91.90.0/23, 144.91.92.0/23, 144.91.94.0/23, 144.91.96.0/23, 144.91.98.0/23, 149.102.128.0/21, 149.102.136.0/21, 149.102.144.0/21, 149.102.152.0/21, 161.97.100.0/23, 161.97.102.0/23, 161.97.104.0/23, 161.97.106.0/23, 161.97.108.0/23, 161.97.110.0/23, 161.97.112.0/23, 161.97.114.0/23, 161.97.116.0/23, 161.97.118.0/23, 161.97.120.0/23, 161.97.122.0/23, 161.97.124.0/23, 161.97.126.0/23, 161.97.128.0/19, 161.97.160.0/20, 161.97.176.0/21, 161.97.184.0/22, 161.97.188.0/23, 161.97.64.0/23, 161.97.66.0/23, 161.97.68.0/23, 161.97.70.0/23, 161.97.72.0/23, 161.97.74.0/23, 161.97.76.0/23, 161.97.78.0/23, 161.97.80.0/23, 161.97.82.0/23, 161.97.84.0/23, 161.97.86.0/23, 161.97.88.0/23, 161.97.90.0/23, 161.97.92.0/23, 161.97.94.0/23, 161.97.96.0/23, 161.97.98.0/23, 164.68.100.0/23, 164.68.102.0/23, 164.68.104.0/23, 164.68.106.0/23, 164.68.108.0/23, 164.68.110.0/23, 164.68.112.0/23, 164.68.114.0/23, 164.68.116.0/23, 164.68.118.0/23, 164.68.120.0/23, 164.68.122.0/23, 164.68.124.0/23, 164.68.126.0/23, 164.68.96.0/23, 164.68.98.0/23, 167.86.100.0/23, 167.86.102.0/23, 167.86.104.0/23, 167.86.106.0/23, 167.86.108.0/23, 167.86.110.0/23, 167.86.112.0/23"
Firewall rule was successfully created; rule id: '403'.

root@***:~# /usr/local/psa/bin/modules/firewall/settings -a
Firewall rules were successfully activated, use --confirm command within 60 second(s) to confirm activation, otherwise all changes will be rolled back.

root@***:~# /usr/local/psa/bin/modules/firewall/settings -c
Applying and confirmation of firewall changes should be done via different ssh sessions
Note that the « Confirm » command (last one) must be done from another SSH session.
That is to avoid locking yourself out of your server!
Now you should enjoy seeing your server activity decrease in the htop monitoring screen!
Relevant services you may need to block during your attack mitigation period
| Services | IP ranges |
|---|---|
| Semrush | https://ipinfo.io/AS30161 |
| Semrush (2) | https://ipinfo.io/AS396982 |
| Semrush (3) | https://ipinfo.io/AS209366 |
| Hetzner | https://ipinfo.io/AS24940 |
| Contabo | https://ipinfo.io/AS51167 |
| OVH | https://ipinfo.io/AS16276 |
| Dedibox | https://ipinfo.io/AS12876 |
| Huawei | https://ipinfo.io/AS136907 |
| Qwant | https://ipinfo.io/AS199064 |
| China Unicom | https://ipinfo.io/AS4808 |
| https://ipinfo.io/AS396982 | |
| Linode | https://ipinfo.io/AS63949 |
| Aixit | https://ipinfo.io/AS29551 |
| Flyservers | https://ipinfo.io/AS267784 |
| PPTECHNOLOGY | https://ipinfo.io/AS48090 |
| Triolan (MJ12bot) | https://ipinfo.io/AS13188 |
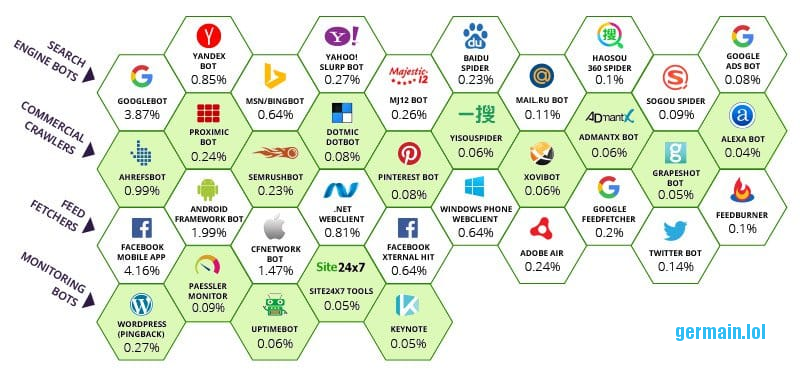
Quelques bots célèbres :
Bon courage.